Tuesday, October 29, 2013

Snowman Gift Card Holders for Christmas Craft Fair

I found the cutest examples of gift card holders on Pinterest.  My favorites were in the shape of snowmen holding a gift card pocket, so I set out to come up with a pattern.

After a LOT of mistakes in measuring and cutting, here is what I created:


I used Spellbinders dies to cut the "cap" and body, Stampin' Up! mitten builder punch for the trim on the hat and, of course, the mittens, as well as to cut out the gift card opening in the red mat.  For his cheeks I used a q-tip dabbed in a soft pink chalk ink and swirled the color around until I was happy with the depth.  His eyes are self-adhesive metal dots, the nose is just a small sliver of orange paper, and his mouth is drawn on by hand.  The finishing touches are the silver and white pom pom for his cap and the multi-colored blue eyelash yarn for his scarf.

Now to come up with a "gal" version of this little guy!!!


Saturday, October 26, 2013

Shimmery, Glittery, Glazed Goodness

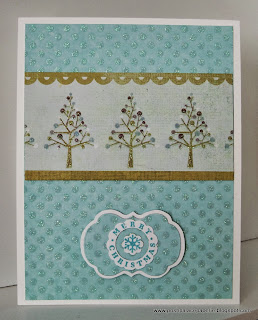
And last but not least...........the final set of cards I made from one shimmery, glittery, glazed piece of 12" x 12" DSP.


The first and last pictures of these single cards are almost identical.  I made a mistake when stamping the sentiment directly on the dsp (on the middle card) and had to improvise with a piece of aqua glittered swiss dot paper and some fussy cutting.  The ribbon I used on the middle card is about 26 years old but in pristine condition and it was perfect for this card and sentiment tag.

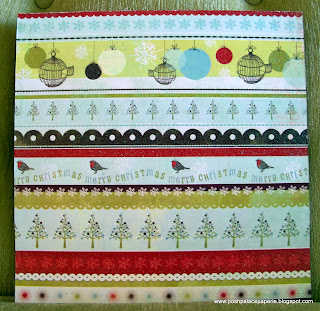
Now for a picture of the DSP that is the twin to the one I used to make all 15 of these cards:


The only parts I didn't use were the very bottom strip of colored snowflakes and the curvy merry Christmas words.

If you are visiting my blog for the first time, be sure to check out the previous 4 posts to see the other cards made with this dsp design.

Friday, October 25, 2013

Little Red Birds All Sparkly for the Holidays

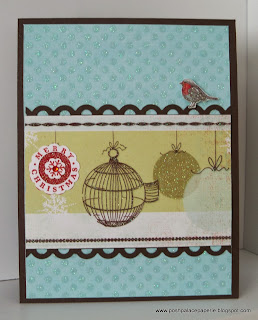
This next set of cards features the cutest little red birds that I cut out by hand from the same DSP I used on the last three posts.


The sentiment on the first card was stamped directly on the printed ornament on the dsp.

My second card had the perfect space for the "Merry Christmas" sentiment, so I stamped it directly on the dsp just above the gittered and glazed trim.

For the third card I used two different SU stamps.  I stamped the sentiment and snowflake image on a piece of Whisper White cardstock, punched out the portions I wanted to use from each image and glued them on the red glittered ornament that was part of the dsp.

The little bird is adhered with a pop dot to add some dimension and make him look like he's perched on top of the scalloped border.

I'll take a picture of the glittered and glazed DSP and post it with the next and last set of cards I made from it.

Thursday, October 24, 2013

Recipe -- Design Series Paper With A Glaze

The last two posts have featured cards from a 12" x 12" sheet of DSP which sports a glittery glaze.  Don't quote me on this, but I think it's from My Mind's Eye.

Anywho......here is another set of cards from that same sheet of DSP:


I don't always have a favorite, but I love this last card with the gingham bow and JustRite Christmas ornament stamp & Joy sentiment. 
 
All of the cardstock (except the DSP) are from Stampin' Up! as well as the sentiments and punched out shapes on the first two cards. 
 
Two more sets of cards coming up from this one 12" x 12" sheet of DSP.


Wednesday, October 23, 2013

Another Set of Cards For the Craft Fair

I have been having so much fun creating cards for the up-coming craft fair.  The last post, this one and a few more will feature cards I made from a 12" x 12" sheet of DSP that was given to me at a crop a couple of years ago.


The aqua dotted swiss paper is some I picked up at Tuesday Morning two or three years ago.  It paired up really well with the DSP.  Sentiments and cardbases are from Stampin' Up!.

I'll show another set of cards from this same sheet of DSP on my next post.

Monday, October 21, 2013

Shimmery Dry-Embossed Card Mats for Christmas

I found some great 8 1/2" x 11" paper at Michaels that has a shimmery side.  It's called Precious Metals Cardstock Paper and it's by Recollections.  It comes with 10 each of 5 different colors.

Here's a couple of the cards I made using the shimmery white cardstock:


When the light hits the paper just right you can see it has a gold shimmer.  The snowflakes are punched from the same paper.


More photos later. Back to making more goodies for the craft fair.

Tuesday, October 15, 2013

Sparkly & Festive Snowmen

There's a local craft fair in my community in a few weeks.  I have been crazy busy making cards and other goodies for it which is why I haven't posted pictures of any of my new items in the past few days.

Here's a couple of cards from one of the Christmas card sets:


The pictures don't do the snowmen justice as they are glazed and have a dusting of ultra fine glitter to make them all sparkly.  So cute and festive!

Friday, October 11, 2013

Handmade Card from 10/9/2013 Post with Sentiment

I posted one of my cards a couple of days ago that I forgot to stamp a sentiment on.  Here is a picture of the completed card using a stamp from SU's Thanks for Caring set.


Tomorrow I will share a couple of photos of some Christmas cards I just finished for a craft fair here in Florida.

Hugs,
Vickie M.

Wednesday, October 9, 2013

More Gabrielle Cards to Share

Okay........now for the final three cards I made using BoBunny's Gabrielle Elegance and Unwritten DSP.


On the first card above I stamped the tag using one of the Vintage Vogue stamps by SU.  The bird on the branch and sentiment are from Silhouette Sentiments by SU.
 
 
I die cut the butterfly image from the dsp used as the mat on the second card.  The die cut mats cover the negative space.
 
 
Uh, oh.......looks like I forgot to stamp my sentiment on the oval mat of the third card.  I'll stamp it and post the new photo tomorrow.  I love the little butterfly charm dangling from the bow on this card.  To match the color palette, I colored it with alcohol ink.
 
More cards to post tomorrow!


Tuesday, October 8, 2013

Cards Using BoBunny Gabrielle DSP -- Day 4

I am sooooooooo in love with this Garbielle DSP by BoBunny!  The color combinations are wonderful.

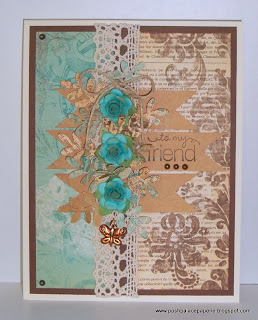
I used paper flowers, tiny pearls, a metal butterfly charm (colored with alcohol inks), butterfly and leaf punches (MS), ribbon and crocheted lace, as well as, Spellbinders dies and various stamps and ink.

These were so much fun to make and each has it's own personality.


Tomorrow I will post the final three cards I made with this dsp, then move on to the Christmas cards I am making.

Monday, October 7, 2013

Handmade Cards Day 3 and a Discovery

Gabrielle.........that's her name.........and a sneaky little dickens is she!!!

After going through several cardstock companies, I finally discovered the name of the beautiful paper I used to make these cards.  The next two or three posts will feature the same paper because I went crazy with it and made a set of 15 cards.

The pictures I took of the cards in groups didn't turn out very good so I decided to post them as individuals.


I created these with Gabrielle Elegance and Gabrielle Unwritten by Bo Bunny.  Such pretty paper!!!

Sunday, October 6, 2013

Handmade Cards with Flowers and Butterflies

I've been perusing the internet trying to identify the DSP I used on these cards and in the previous post.  No luck so far but I will continue to look in case I stumble across it.

In the meantime, here are some more of the cards I made from it:


Tomorrow I will post more pictures of the cards in this set.  Thanks for stopping by for a look.

Saturday, October 5, 2013

World Card Making Day and A Fresh Start

As those in the card making world know, today is World Card Making Day and this was as good a time as any to finally start blogging and posting some of my paper creations.

I have been working on a set of cards made from a couple of sheets of double-sided dsp (that I've had in my stash for a long time), but can't remember what it's called or who it is made by.

Here are three of the fifteen cards I've made so far:


Please forgive my poor photography skills.  I'm trying to figure out why the cards look bowed on the sides when they are straight.  Any suggestions as to how to alleviate that unwanted effect would be appreciated and can can be left in the comments section of this post.
 
I'll post a couple more pictures tomorrow.